Brooklyn Sewcial
  • Home
  • Classes
    • Kids After School
    • Adult Classes
    • Private Lessons
    • CAMP
  • Birthday Parties
    • Kids Parties
    • Adult Parties
  • Blog
  • Contact
  • Meet the Teachers
  • Products

Learn How to Sew

6/9/2016

1 Comment

 
 Parts of the Machine: Pedal (Foot Controller), Presser Foot, Handwheel, Backstitch, Thread Cutter
 Threading the Bobbin:

  1. Pull spool-pin up as far as possible, then put thread on pin.
  2. Pass thread around pretension disk twice. (all machines wrap around this slightly different, check your manual.)
  3. Pass the end of the thread through the hole on the bobbin from the inside of the bobbin.
  4. Put the bobbin onto the bobbin winder shaft and slide the bobbin winder shaft to the right. Turn the bobbin clockwise, by hand, until the spring on the shaft slides into the groove on the bobbin.
  5. Holding the thread up, gently press the pedal to wind the thread around the bobbin a few times then stop. Trim the excess thread above the bobbin. (If you do not trim this thread, it may get caught while sewing and interfere with operations.)
  6. Continue to wind bobbin by pressing the pedal until the bobbin is full.
  7. When full, cut thread, slide bobbin shaft to the left and remove bobbin.
  8. Thread your bobbin following the instructions on machine.
​​
Threading the Needle:
  1. Raise the presser foot using the presser foot lever. Raise the needle using handwheel (make sure the line on handwheel is facing up), or use the needle position button.
  2. Pull spool pin up as far as possible and put thread on.
  3. Feed the thread through as shown in diagram
  4. Be sure to catch the thread in the thread take up lever from right to left.
  5. Put the thread behind the needle bar thread guy above the needle.
  6. Thread the needle from front to back and pull about 2 inches of extra thread.
  7. Draw up the lower thread  *parts of these directions have been adapted from the Brother Sewing Machine Guidebook​

Part 2: Practice Stitching Straight Lines
  1. Check your stitch length (our machines are at a width of 00) and length (3.5).
  2. Start with two rectangles of fabric.
  3. Line up about ½” from back edge and side lined up with tape.
  4. Put presser foot down.
  5. Backstitch 3-4 stitches.
  6. Sew straight lines- do not pull or push, just gently guide.
1 Comment

Quick Tip: Napkin Sewing

6/9/2016

1 Comment

 
Picture
Picture
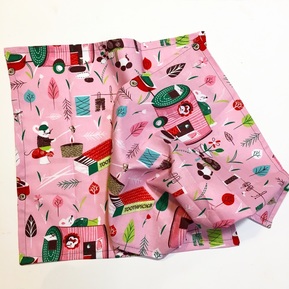
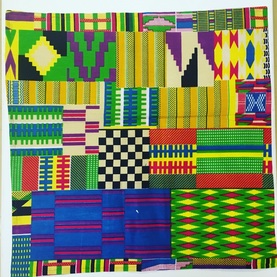
Part 1: Make a Pattern and Cut Our Fabric
  1. Decide what size napkin you would like to make- add ¾” for each hem (1.5”/side)- draft and cut pattern.
Ex. I want my napkins at 18” I will make a pattern for 19.5”x19.5”
  1. Place pattern on top of 2 layers of fabric (this will cut 2 napkins at a time).
  2. Pins should be inside pattern (we will not cut our pins). Make sure you catch both layers of fabric.
  3. Cut around outside of paper on FABRIC ONLY.
Part 2: Sew our Napkins *If you have never sewn, Check out our Beginner Sewing Post
  1. Iron opposite sides of fabric first. Double Fold your fabric with 1/4" fold Then iron the other two sides. Fold down twice.
  2. Put fabric in machine, lining up the needle just inside the folded edge of fabric (inner fold, like how a hem is sewn).
  3. Back stitch, stitch your first line. When you get to the corner pivot- put your needle DOWN, lift your presser foot up, turn the fabric, put the presser foot down, and continue. Repeat until back at start. Backstitch at end.

For Mitered Corners:
  1. To make pattern add only ½” S/A to each side. Ex, 18” napkin is 19”x19” square.
  2. Iron all 4 sides with one ½” turn. Unfold.
  3. Right sides together, fold fabric diagonally in half. Keeping perpendicular, sew 1” from edge of point. Stop at ironed line.
  4. Cut point off at 45°. Finger-press seam open.
  5. Flip Right-Side-Out, fold ironed hem under and stitch around inside edge.


For Double Sided Napkins:
  1. To make pattern add only ½” S/A to each side. Ex, 18” napkin is 19”x19” square.
  2. Cut 1 main fabric and 1 contrast fabric for each napkin.
  3. Place Main and Contrast fabrics RIGHT-sides-together (nice sides inside), pin for sewing.
  4. Stitch napkins all around leaving a 3” gap in the center of one side (stitch all corners).
  5. Cut the excess fabric off the corners, do NOT cut stitching.
  6. Flip right side out, Iron Flat, tuck in fabric at opening, and stitch around the whole napkin.


Now Go and Practice!!
 If you have any questions about any projects please email me. 
For upcoming classes please check: BrooklynSewcial.com or http://www.meetup.com/Brooklyn-Sewcial-Beginner-Sewing-and-Sweet-Projects/

​Videos will follow

1 Comment

    Brooklyn Sewcial

    Bringing ideas, tips, and tutorials about sewing, DIY and modern crafting. 

    Archives

    December 2019
    October 2017
    May 2017
    April 2017
    June 2016
    March 2016
    February 2016
    January 2016
    October 2015
    August 2015
    July 2015

    Categories

    All

    RSS Feed

      Join Our Newsletter!!

    Subscribe to Newsletter

Location

Contact Us

What Our sewcialists Are Saying

"I can't believe I made all of this after only one week of sewing camp! And I've never even used a sewing machine before! I'm so sad that it is over😢 I really hope i can go again! It was my favorite camp ever!!!!!!" 
Ruby... 12 years old

"I was extremely impressed by Brooklyn Sewcial's adult sewing class. I arrived not knowing a thing about patterns or sewing machines and left with a fully functional (and super cute to boot!) tote bag made by yours truly. I was walked through following a pattern, cutting, pinning and sewing with easy to follow instructions. 

Alexa is a patient teacher and the atmosphere is fun and very laid back. All levels of experience should go check it out! Your future favorite tote (or headband, leggings, etc.) could be waiting for you to create it :)."
Lauren U. ... Adult Class

Subscribe to our mailing list

* indicates required
  • Home
  • Classes
    • Kids After School
    • Adult Classes
    • Private Lessons
    • CAMP
  • Birthday Parties
    • Kids Parties
    • Adult Parties
  • Blog
  • Contact
  • Meet the Teachers
  • Products